Installing add-ons
Installing an add-on
To install an add-on, its source code must be put (deployed) into the appropriate location inside the Moodle installation directory and the main administration page Administration > Site administration > Notifications must be visited. There are three ways how the add-on code can be deployed into Moodle.
In Moodle 2.5 onwards, an add-on code may be deployed from within Moodle, either directly from the Moodle plugins directory or by uploading a ZIP file. The web server process has to have write access to the plugin type folder where the new add-on is to be installed in order to use either of these methods.
Alternatively, an add-on code may be deployed manually at the server.
Installing directly from the Moodle plugins directory
- Login as an admin and go to Administration > Site administration > Plugins > Install add-ons.
- Click the button ‘Install add-ons from Moodle plugins directory’.
- Search for a plugin with an Install button, click the Install button then click Continue.
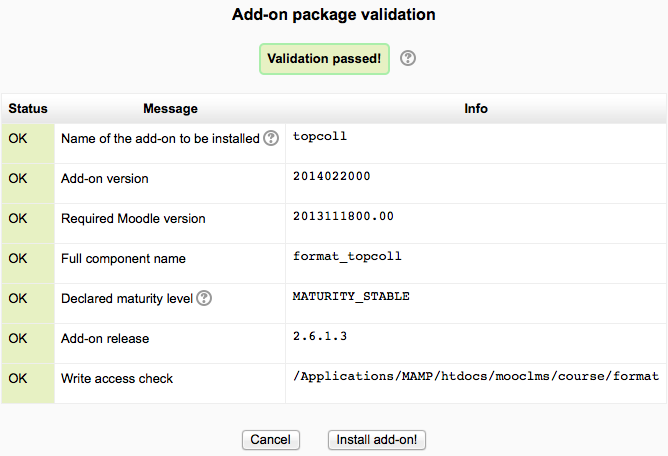
- Check that you obtain a ‘Validation passed!’ message, then click the button ‘Install add-on’.
Installing via uploaded ZIP file
Go to the Moodle plugins directory , select your current Moodle version, then choose an add-on with a Download button and download the ZIP file.
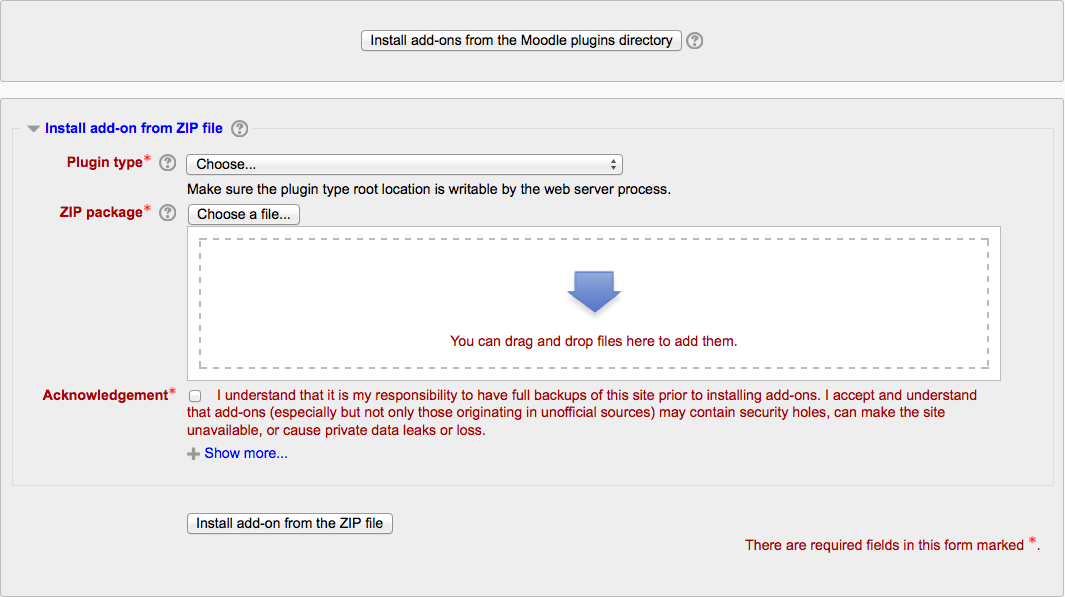
Login to your Moodle site as an admin and go to Administration > Site administration > Plugins > Install add-ons.
Upload the ZIP file, select the appropriate plugin type, tick the acknowledgement checkbox, then click the button ‘Install add-on from the ZIP file’.
Check that you obtain a ‘Validation passed!’ message, then click the button ‘Install add-on’.
For both of the above methods, after clicking the button ‘Install add-on’, you will then be automatically redirected to Settings > Site administration > Notifications and the installation process (i.e. creating required database tables etc) will happen.
Installing manually at the server
If you can’t deploy the add-on code via the administration web interface, you have to copy it to the server file system manually (e.g. if the web server process does not have write access to the Moodle installation tree to do this for you).
First, establish the correct place in the Moodle code tree for the add-on type. Common locations are:
- /path/to/moodle/theme/ - themes
- /path/to/moodle/mod/ - activity modules and resources
- /path/to/moodle/blocks/ - sidebar blocks
- /path/to/moodle/question/type/ - question types
- /path/to/moodle/course/format/ - course formats
- /path/to/moodle/admin/report/ - admin reports
Uninstalling an add-on
To uninstall an add-on
- Go to Administration> Site Administration > Plugins > Plugins overview and click the Uninstall link opposite the add-on you wish to remove.
- Use a file manager to remove/delete the actual plugin directory as instructed, otherwise Moodle will reinstall it next time you access the site administration.
Prevent installing add-ons from within Moodle
If required, installing and updating from within Moodle can be prevented by copying the following lines of code from config-dist.php and pasting them in config.php.
// Use the following flag to completely disable the On-click add-on installation feature and hide it from the server administration UI.
// $CFG->disableonclickaddoninstall = true;